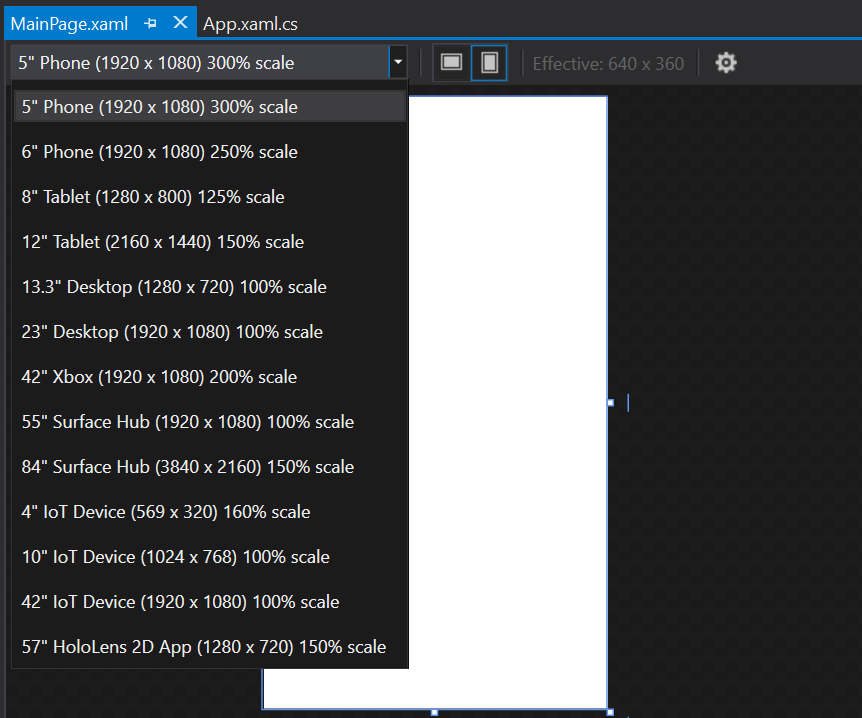
The Visual Studio XAML Designer for Universal Windows Platform offers design-time device previews for several different screens size and scaling combos. Unfortunately, the default selection might not be sufficient for you in some cases, especially when you want to optimize for a specific screen. Is it possible to expand the selection with more devices?
Where are the devices defined?
First thing we need to do is to find the place where the device definitions are stored. The default place where the Windows SDK files are installed is C:\Program Files (x86)\Windows Kits . On this location we will find the "10" folder, which is the home of UWP SDKs.
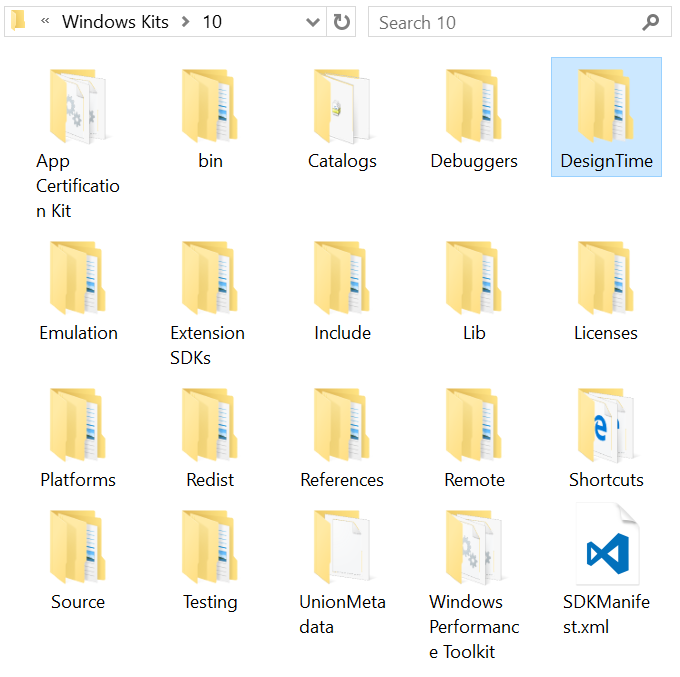
This folder is definitely browse-worthy, but the most interesting for us in this case is the "DesignTime" folder. This folder contains "CommonConfiguration" directory (which contains the default control templates, styles and theme resources for built-in XAML controls), and also the "UAP" directory. If we open it and go into "Devices/1033", we will finally reach our final destination.
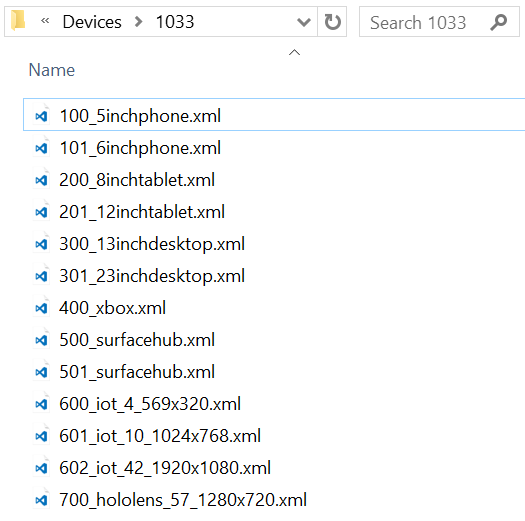
The full path C:\Program Files (x86)\Windows Kits\10\DesignTime\UAP\Devices\1033 is where all the design device definitions reside. You can see that they are plain simple XML files, named ###_name.xml , where ### is a number that is supposedly used just for ordering purposes and name is used for easy identification.
Creating a custom device
Let's try to create a new custom device that will be very similar to the Lumia 520 - 4 inch display with 480 x 854 pixels and 150% scaling factor, which yields the smallest supported effective screen size for UWP Mobile - 320 x 569. The easiest way to start creating a new device definition is to just copy one of those already existing. I recommend you to copy the file to Desktop or other accessible location, because you will otherwise need to grant yourself permissions before trying to save the modified XML file in Program Files. The file structure is very self-explanatory.
<?xml version="1.0" encoding="UTF-8"?>
<Device name="Phone" width="480" height="854" scale="150" size="4" default="true" resize="false" icon="Assets/phone_icon.ico" generic="Generic/generic.xaml" MinVersion="10.0.0.0">
   <Device.Qualifiers>
      <Qualifier Name="DeviceFamily">Mobile</Qualifier>
      <Qualifier Name="Orientation">Portrait|Landscape</Qualifier>
   </Device.Qualifiers>
</Device>
We can edit the following attributes:
Name - name that will be displayed in the list
Width - physical width of the screen in pixels
Height - physical height of the screen in pixels
Scale - scaling factor in percents, must be either 100, 125, 150, 200 or 400
Size - the diagonal size of the device's display in inches
Finally, we can also define some qualifiers inside the <Device.Qualifiers>element:
DeviceFamily qualifier - the device family, can be either Mobile, Desktop, Xbox, IoT, HoloLens or PPI (which stands for Surface Hub)
Orientation qualifier - pipe-separated list of orientations the device supports, Portrait and Landscape seem to be the only options that are actually reflected in the designer
Once we are satisfied with our new device definition, we can copy it to the "1033" directory alongside the others and restart Visual Studio. Once you load the designer, you will find your new device listed among others.

You can download the 4'' phone definition shown above here.
Summary
The XAML designer is very useful to avoid having to rebuild the entire project when working on the app layout. The default list of devices is by no means complete, but you can easily extend it by creating your own XML-based device definitions.