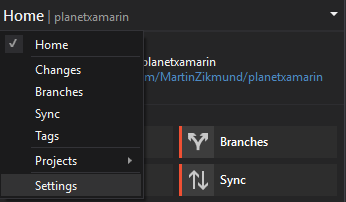
Forking and opening a GitHub repo in Visual Studio is a matter of seconds. But how to keep your fork up-to-date easily, all within the Team Explorer window? All you need to do is to add the upstream remote. Navigate to your cloned fork in Team Explorer, click the title bar to reveal repository menu and select Settings.
In the opened page select Repository Settings and then find the Remotes section at the bottom:
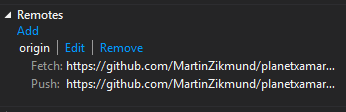
Click the Add link to open the Add Remote dialog window. Here fill out:
- Name - upstream
- Fetch - URL of the original GitHub repository you forked
- Push - same as Fetch
- Push matches fetch - leave checked
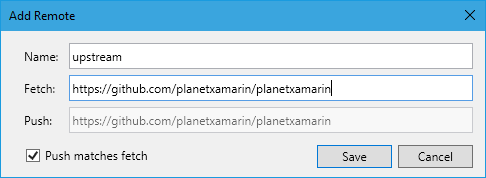
Confirm with Save and that's almost it. Now we just need to do a fetch to get the current state of the upstream. Click the title of the Team Explorer window again and navigate to Sync:
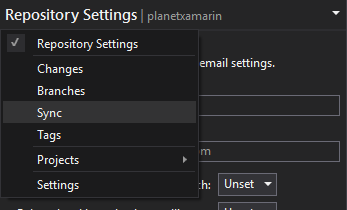
And from the top menu click the Fetch link, select upstream from the dropdown menu and click Fetch. Now the branches from the repository should be available in the Branches view and you can merge the latest changes from upstream in your fork.